Magento Continue Shopping Back to Last Page
-
Overview of Magento Shopping Cart
-
1. How to Configure the Redirect Link to Magento Cart
-
2. How to Configure the Mini Sidebar for Magento Cart
-
3. How to Configure the Magento Cart Link
-
4. How to Configure the Gift Options for Magento Cart
-
5. Configure Persistent Magento Shopping Cart
-
End Note
Overview of Magento Shopping Cart

The shopping cart is where the checkout point is initiated. It includes activities such as:
- Calculating order total
- Adding discount coupons
- Estimate shipping & tax
- Cross-sell items
1. How to Configure the Redirect Link to Magento Cart
You can decide to either keep the customer on the same page or redirect to the cart page. The redirect encourages customers to checkout for a fast conversion.
If you choose not to redirect, it's prompting customers to continue shopping.
It's a balance between letting customers shop while also encouraging them to checkout
Steps to configure the Redirect Link to Magento Cart-
-
Use the Admin sidebar, go to Stores > Settings > Configuration.
-
On the left panel, expand the Sales option & choose Checkout.
-
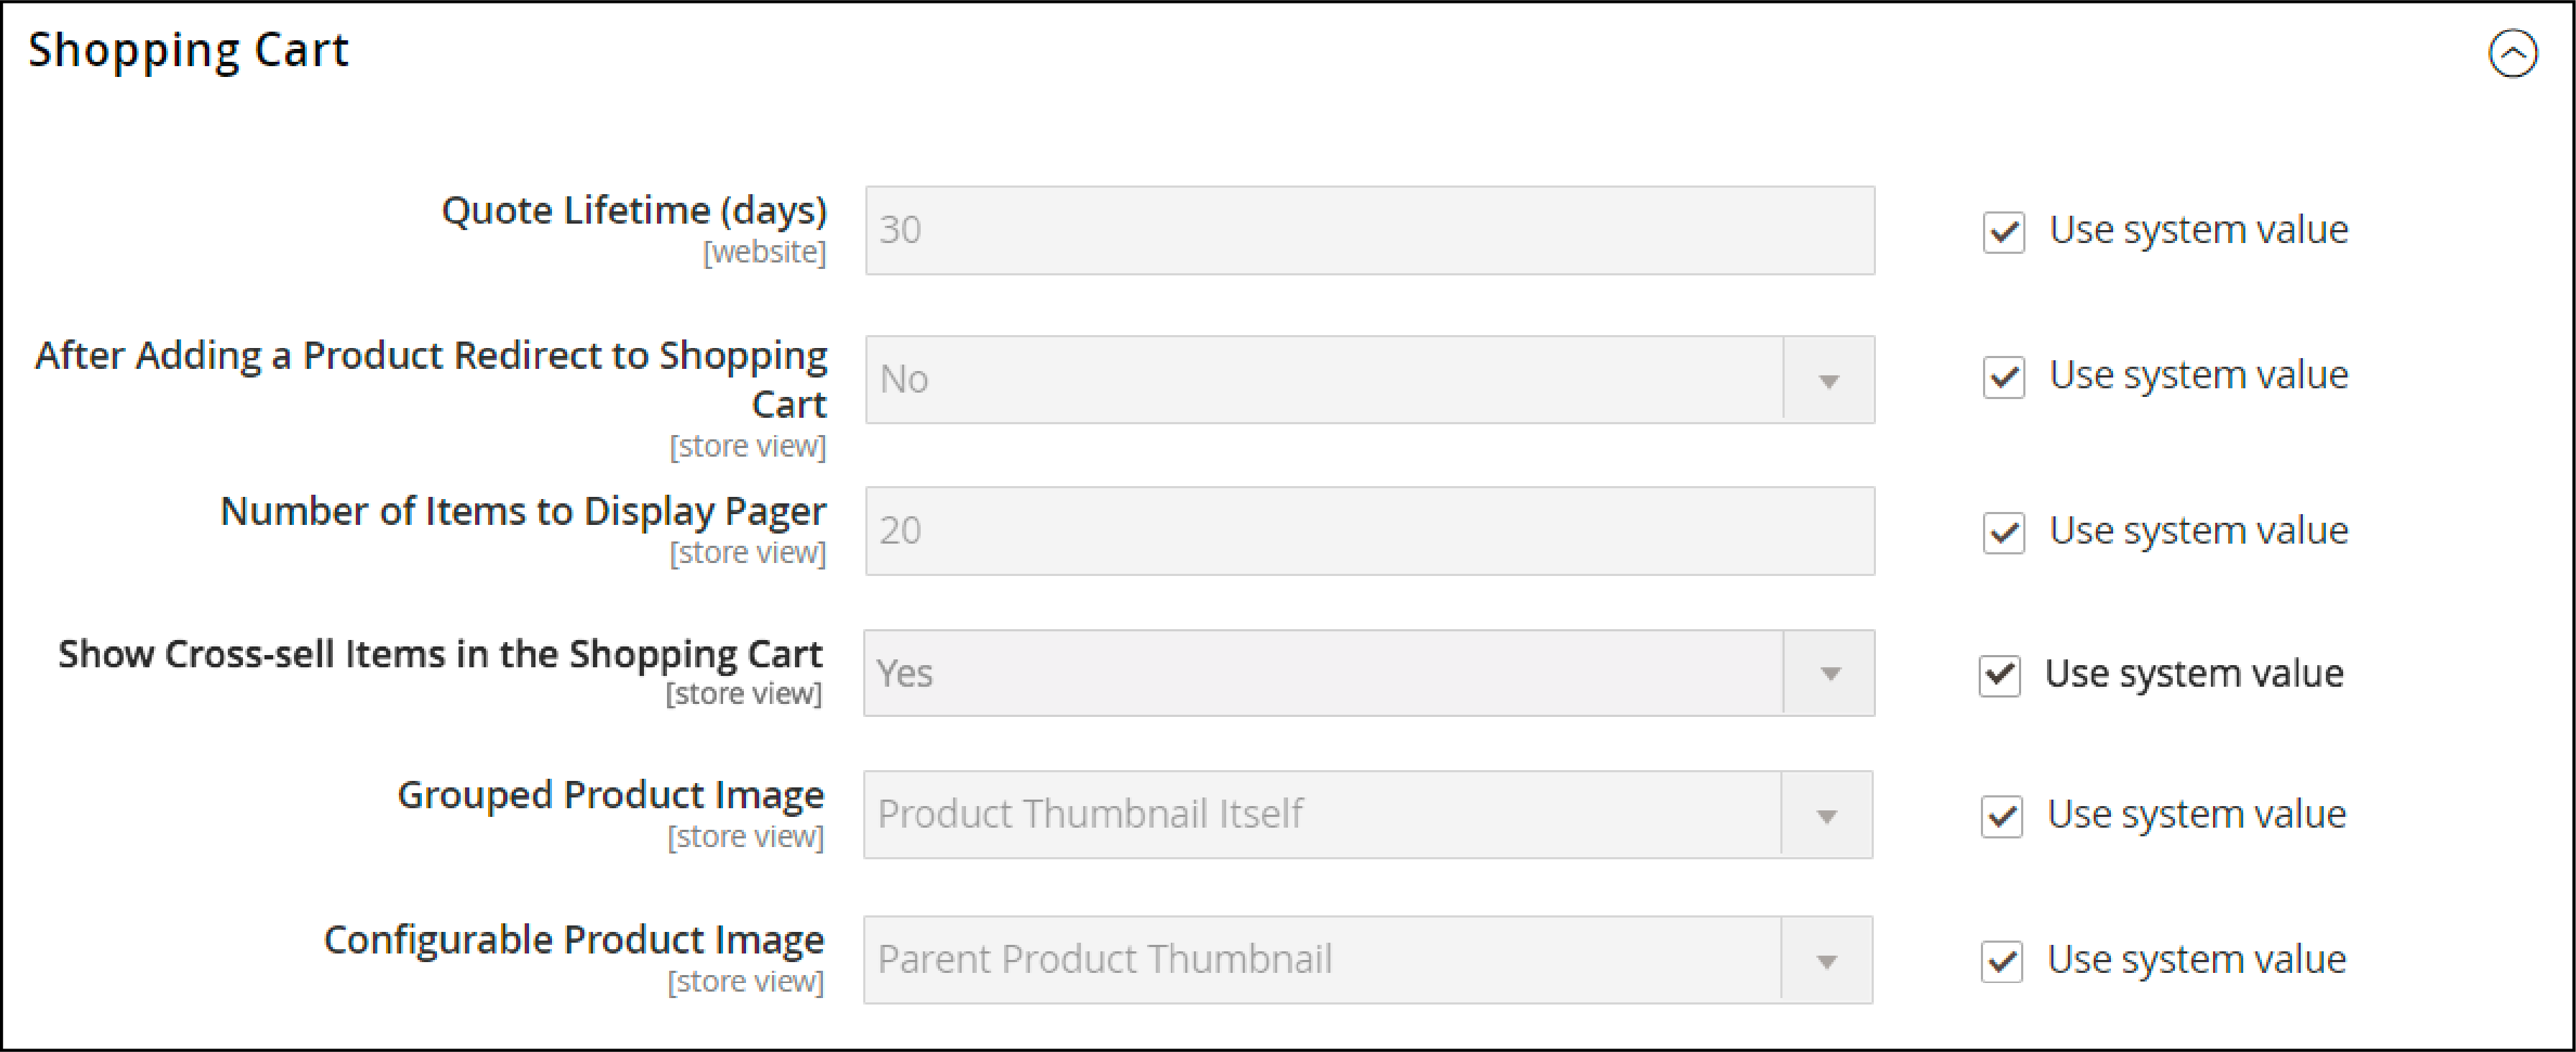
Expand the Shopping Cart section.
-
For a specific store view, choose the store view where the configuration applies.
-
Click on OK to continue.
-
Configure After Adding a Product Redirect to Shopping Cart:
You can set it as:
- Yes- Shows the shopping cart page directly after a product is added to the cart.
- No- Disables redirect to the shopping cart after a product is added to the cart.
- Click on Save Config.
We recommend doing an A/B test to see which option turns into a higher conversion rate.
2. How to Configure the Mini Sidebar for Magento Cart
The mini cart shows the item's summary in the cart. It appears when you click the Cart link at the top of the page.
The mini cart is enabled by default.
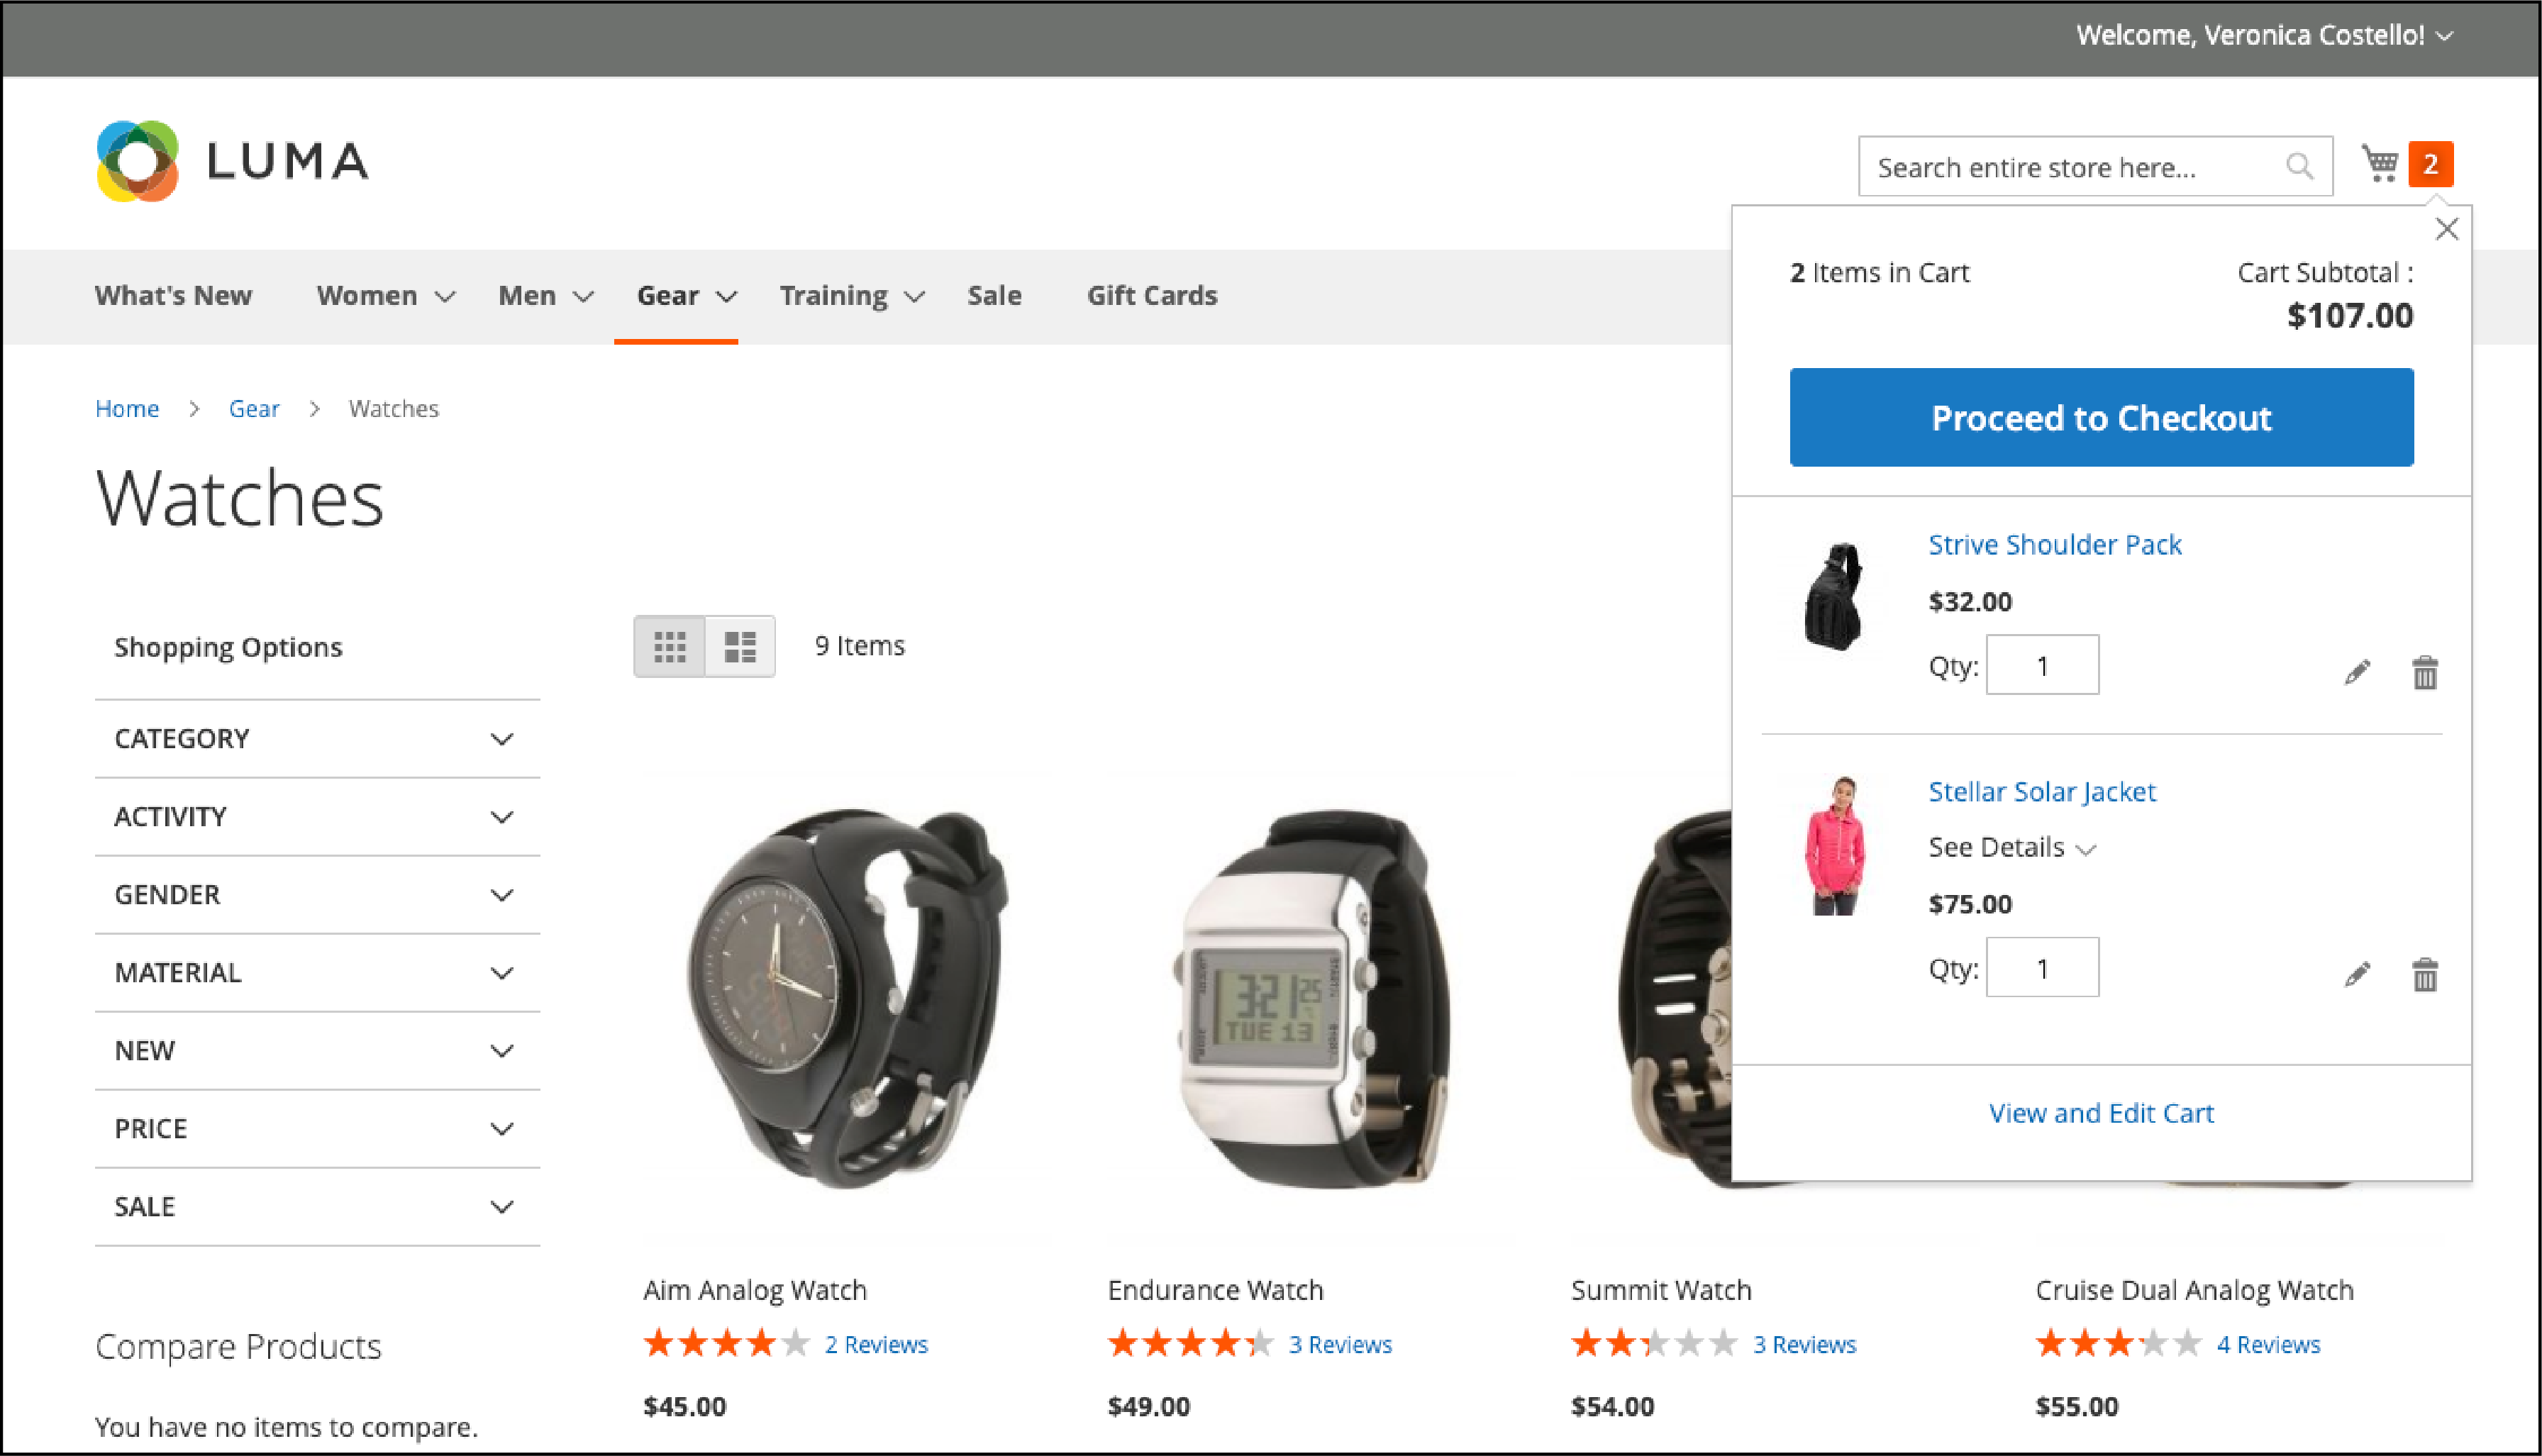
Steps to configure the mini cart in Magento-
-
From the Admin sidebar, navigate to Stores > Settings > Configuration.
-
On the left panel, expand the Sales section and click on Checkout.
-
Expand the Mini Cart section.

-
For a specific store view, select the store view where the configuration applies.
-
Click on the OK to continue.
-
Set Display Mini Cart to one of the following:
- Yes -Shows the mini cart on store pages. The sidebar design depends on the theme.
- No -Does not display the mini cart on store pages.
- If the display is enabled, update these options:
-
Number of Items to Display Scrollbar -Add the number of items that can appear in the sidebar. The items can appear before the scrollbar is triggered.
-
Maximum Display Recently Added Items -You can add the maximum number of recently added items. It will then appear in the mini cart.
- Click on Save Config.
3. How to Configure the Magento Cart Link
The cart link gives a quick overview of the items in the cart.
Configuring this function helps you determine whether your shopping cart icon is able to display the total number of products in the cart.

Steps to configure the Magento cart link
-
From the Admin panel, go to Stores > Settings > Configuration.
-
Expand the Sales section and select Checkout.
-
Click on the My Cart Link section.
-
Set Display Cart Summary to one of the following:
-
Display item quantities -Shows the total number of products in the cart. It also adds the quantities for each product.
-
Display number of items in cart -Shows the number of products in the cart, regardless of quantity.

- Click on Save Config.
4. How to Configure the Gift Options for Magento Cart
The gift options allow customers to add a gift message, gift wrapping, or greeting card to their items.
It is displayed in the cart before the checkout process.
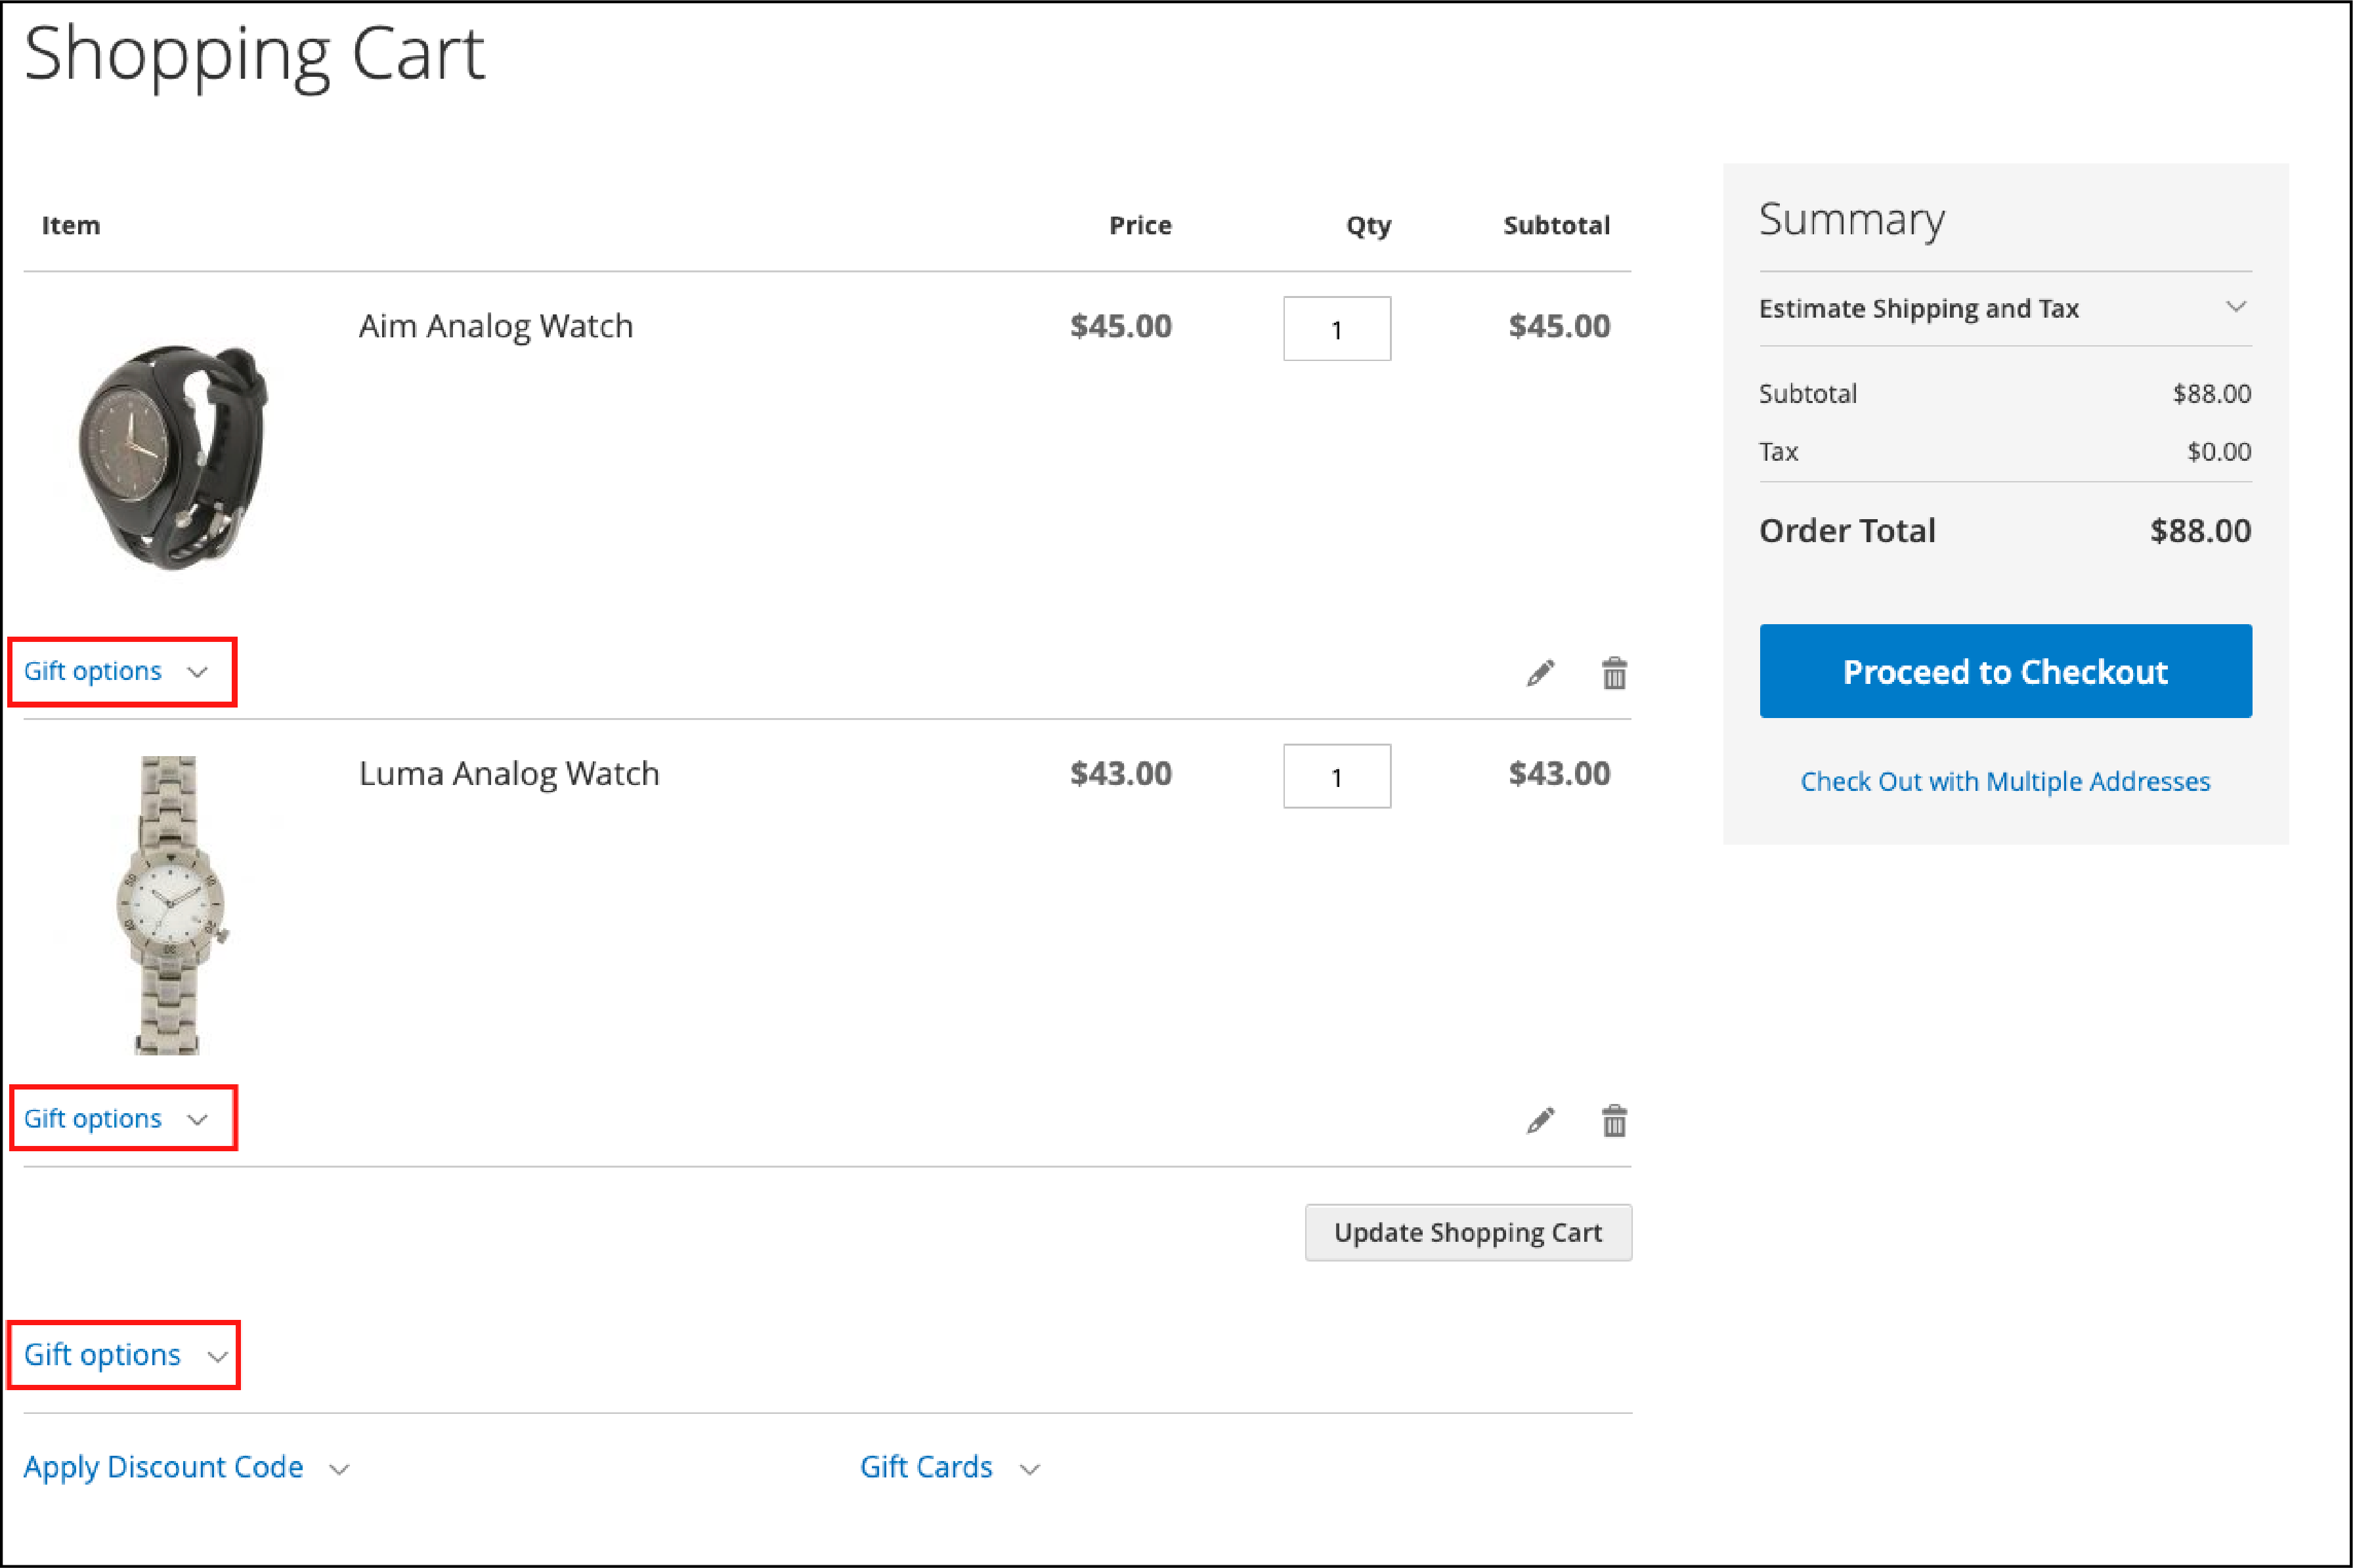
Steps to Enable gift options-
-
From the Admin sidebar, navigate to Stores > Settings > Configuration.
-
Expand the Sales option and choose Sales.
-
Expand the Gift Options on the page.
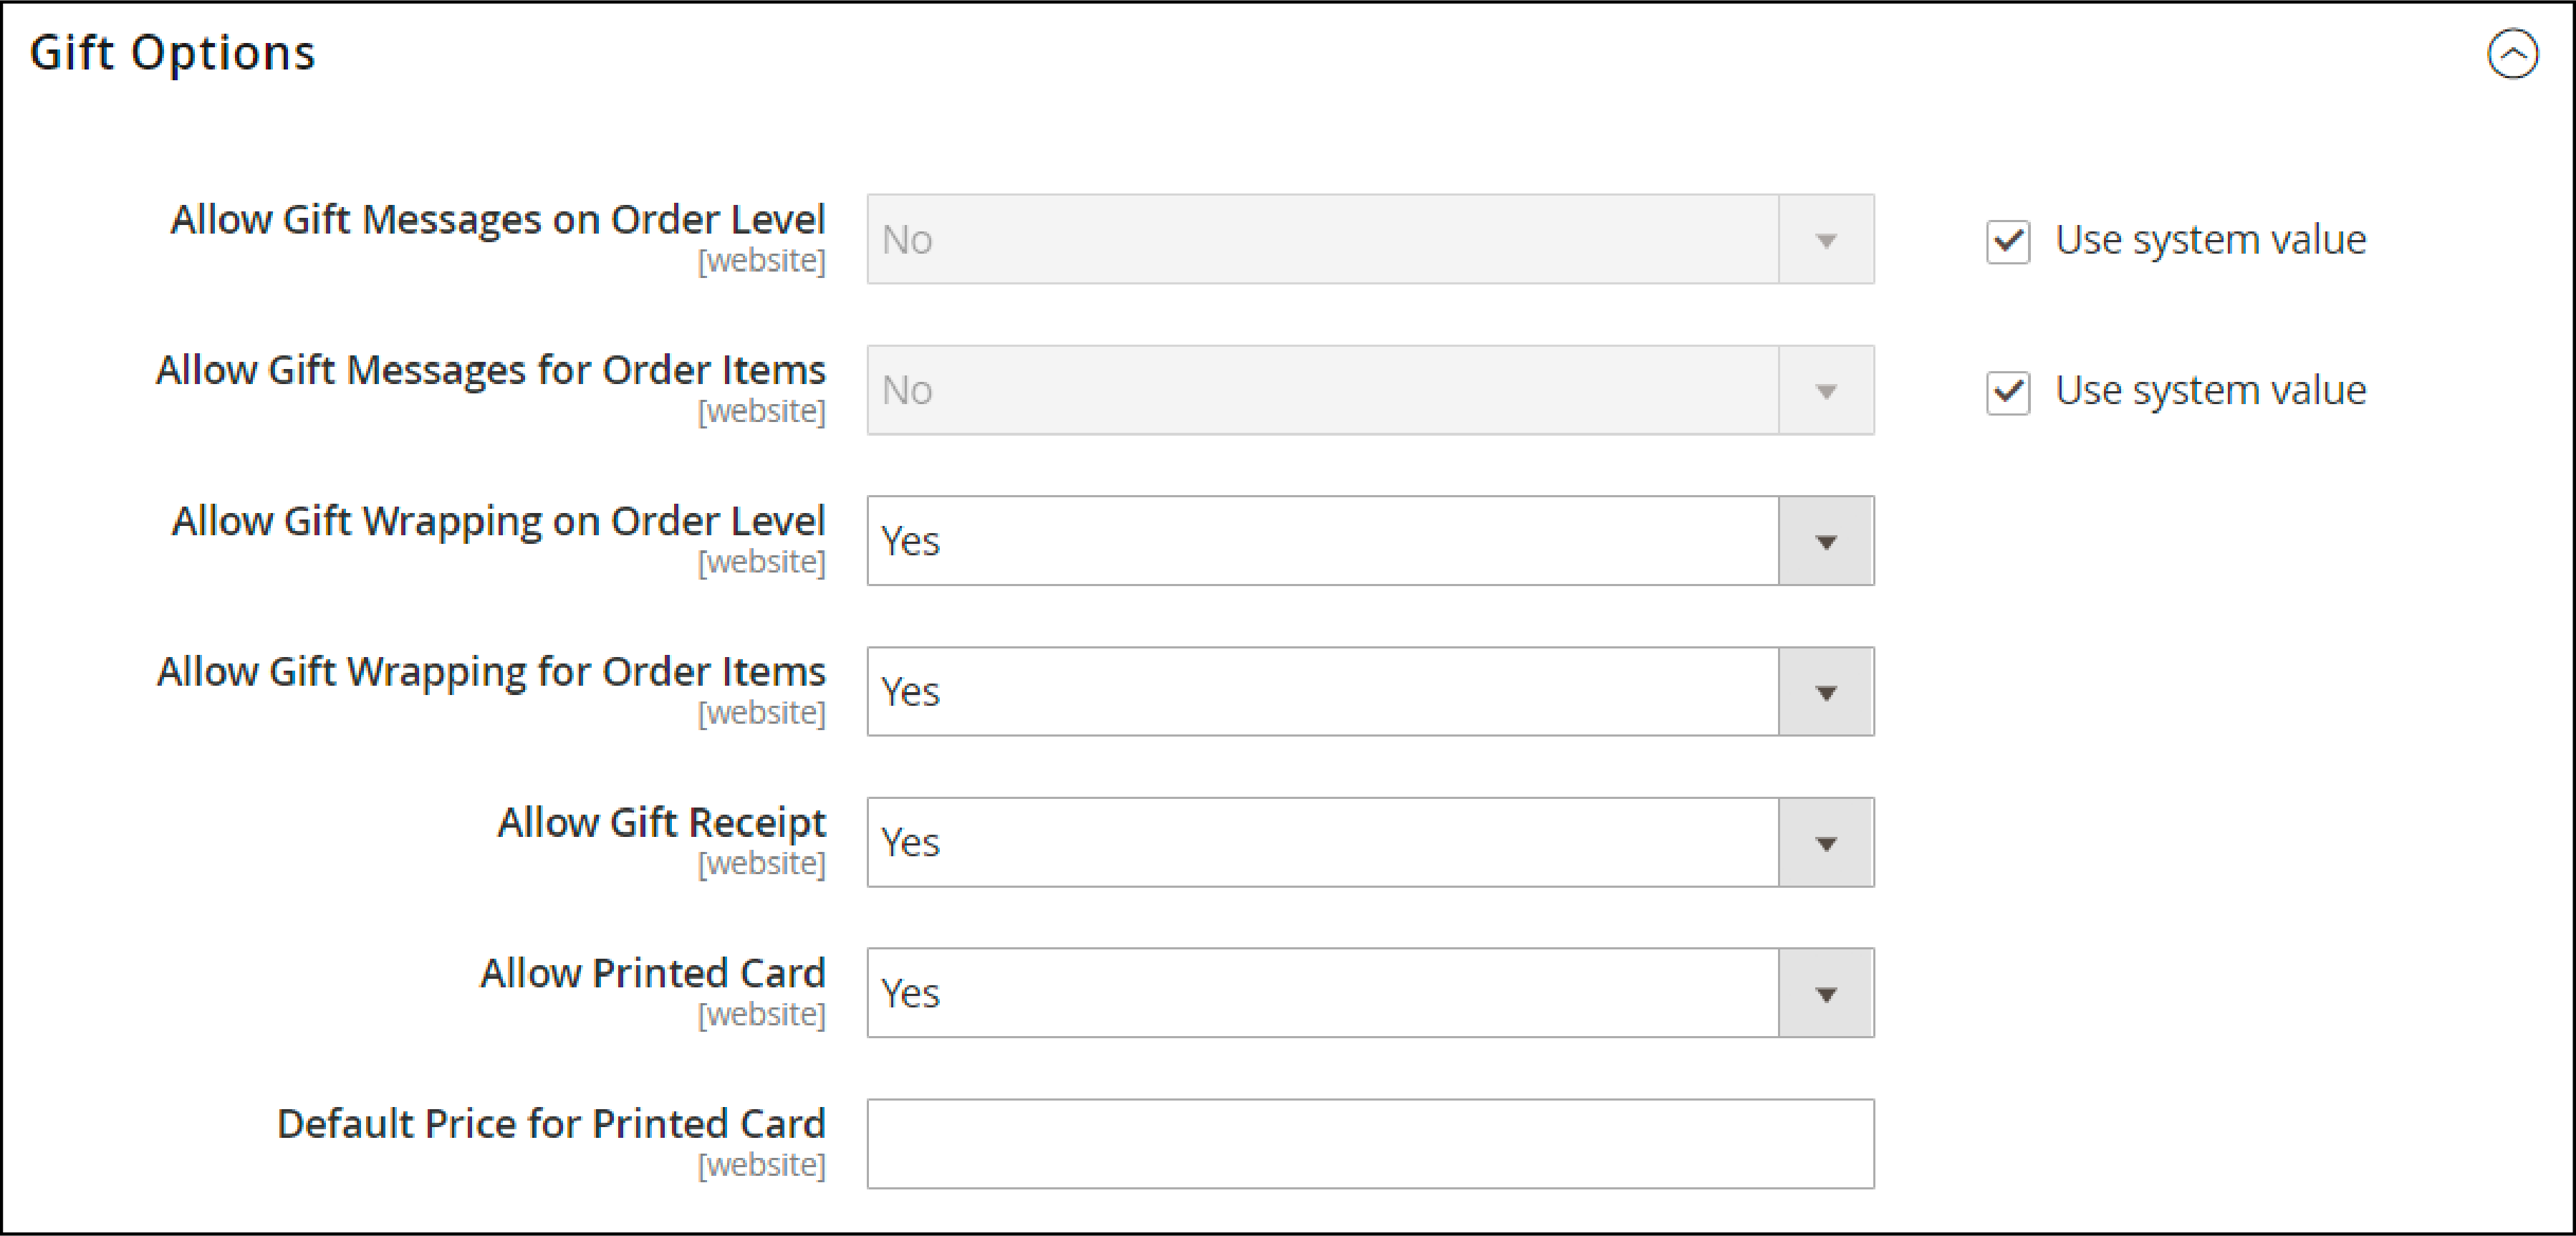
- Configure the gift message settings:
- Allow Gift Messages on Order Level
- Allow Gift Messages for Order Items
- Set the gift wrapping options:
- Allow Gift Wrapping on Order Level
- Allow Gift Wrapping for Order Items
-
To let customers have a gift receipt, select Allow Gift Receipt to Yes.
-
To let customers include a printed card, set Allow Printed Card to Yes.
-
Add the Default Price for Printed Card.
-
Click on Save Config.
5. Configure Persistent Magento Shopping Cart
The persistent shopping cart tracks unpurchased items that are left in the cart.
The information is saved and restored for the customer's next visit.
Steps to configure Persistent Magento Shopping Cart-
- Using the Admin sidebar, go to Stores > Settings > Configuration.
Expand Customers and select Persistent Shopping Cart.
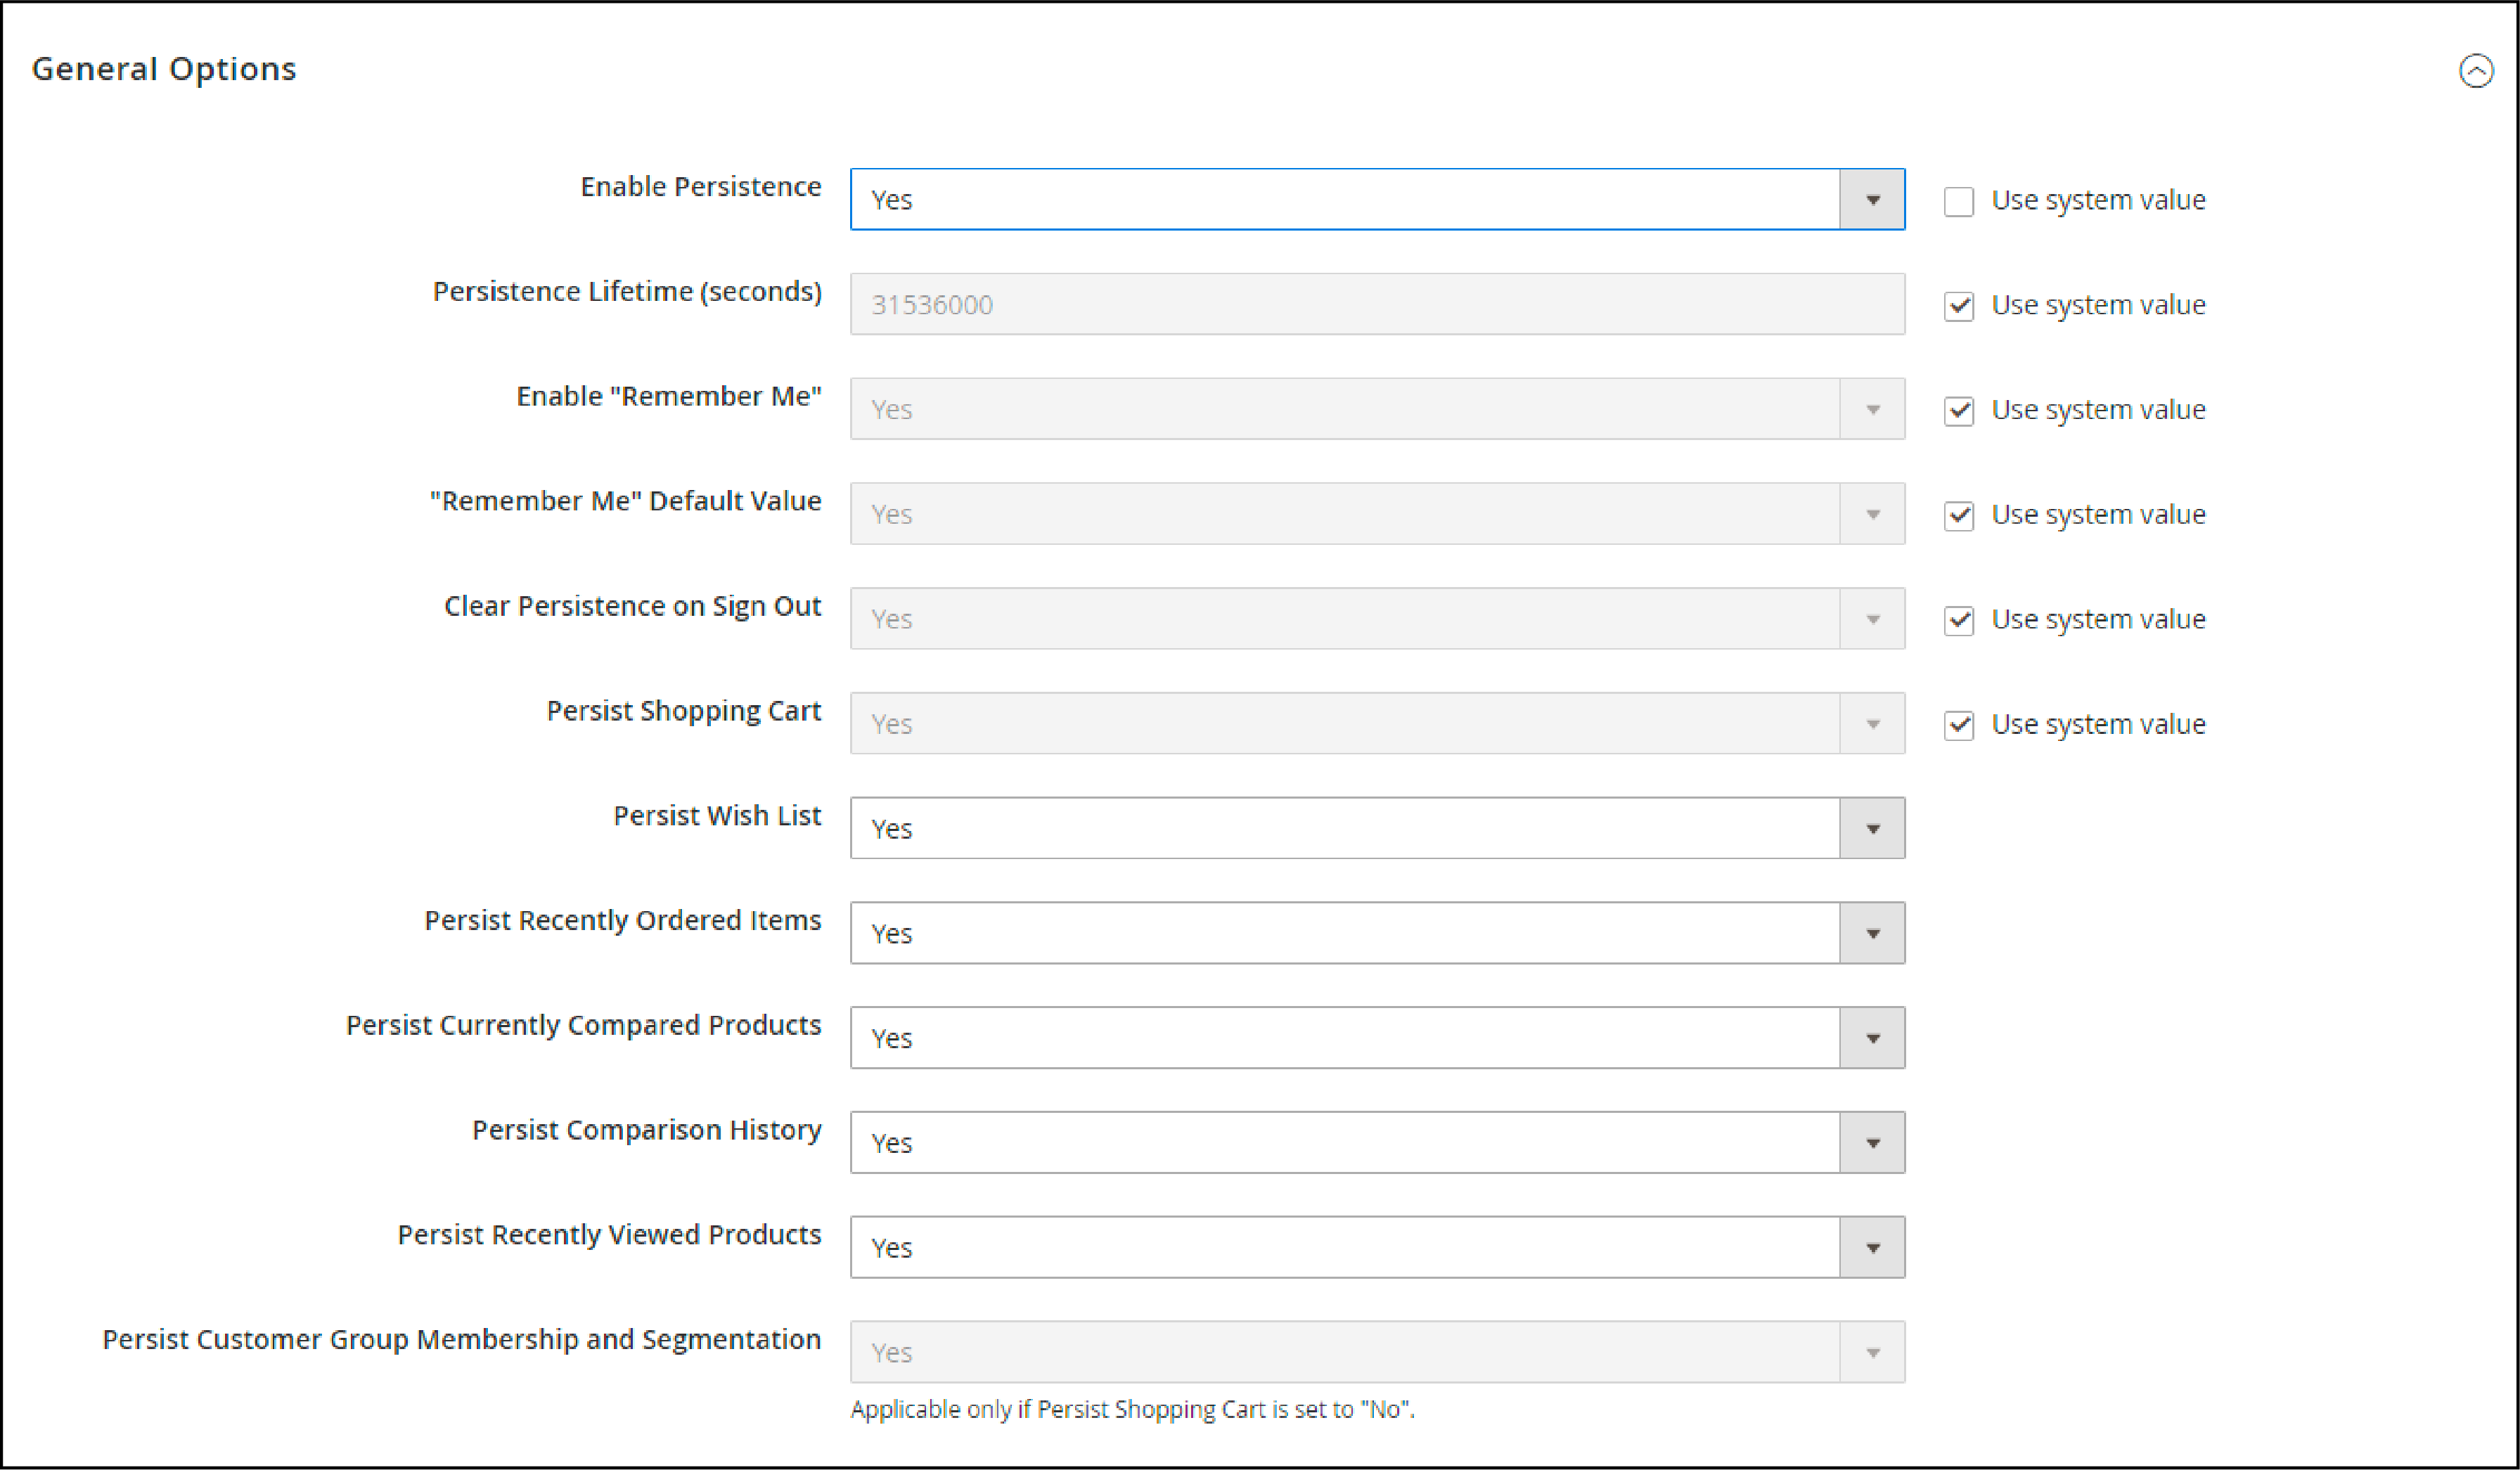
- To enable the persistent shopping cart, set Enable Persistence to Yes.
-
To set the Persistence Lifetime, enter the length of time, in seconds.
The default value is 31,536,000 seconds, which is equal to one year. It is the maximum time allowed. -
Configure Enable "Remember Me" to one of the following:
- Yes -Shows the Remember Me checkbox on the Login page of your store. Customers can save their shopping cart information.
- No -Persistence on sign is enabled, but customers don't have the option to choose if they want to save their information.
- Configure Clear Persistence on Log Out to one of the following options:
- Yes -The cart is cleared when a registered customer logs out.
- No -The cart is saved when a registered customer logs out.
- Set Persist Shopping Cart to one of the following:
- Yes -If a shopper logs in or creates a new account, the shopping cart is restored.
- No -After a session cookie is expired, the shopping cart is not preserved for guests.
- Configure Persist Wish List to see if customer wish lists is retained when the session ends:
- Yes -The wish list is saved when the session ends.
- No -The wish list is not saved after the session ends.
- Set Persist Recently Ordered Items to see if recently ordered items is retained when the session ends:
- Yes -Recently Ordered Items are saved when the session ends.
- No -Recently Ordered Items are not saved when the session ends.
-
Set Persist Currently Compared Products to: Yes or No
-
Set Persist Comparison History to: Yes or No
-
Set Persist Recently Viewed Products to: Yes or No
-
Set Persist Customer Group Membership and Segmentation: Yes or No
-
Click on Save Config.
End Note
The shopping cart is the most important part of an e-commerce store. Every little detail can make the difference between a successful shopping experience or a lost customer.
The goal is to create a well structured process to convince the customer to finalize the checkout.
With the right settings in Magento 2 you can reduce the number of cart abandonment rates.
We recommend measuring the conversion rate for each change in the checkout process with A/B testing.
To learn more about the Magento platform, check out the MGT-Commerce blog.
Source: https://www.mgt-commerce.com/blog/magento-2-shopping-cart-configuration/
0 Response to "Magento Continue Shopping Back to Last Page"
Post a Comment